
I decided to do a step-by-step with the miniatures, from assembling to painting. For this one, I chose the Trollblood Long Riders (primarily because Kei wants this done ASAP so he can play with them already).
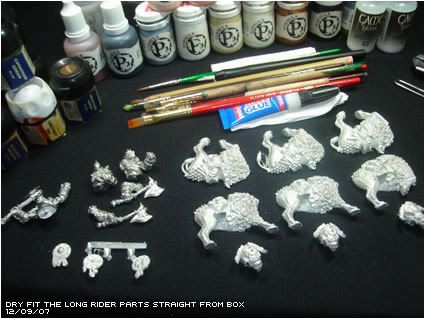
As soon as I open the box, I make sure to see if all the parts are there (and maybe see if I get some bonus bits as well ^_^). If it's all there, I dry-fit the pieces together. This is a basic mistake for some as they just go and superglue on whatever bit they get from the box. Some parts just don't go or fit right with another ~ a harsh lesson I found out with Protectorate Knights Exemplar.
With Games Workshop plastic bits, it's very easy to do. You can even just go Exacto on said bits and glue them together easily. You get nice action poses easy that way. Unfortunately, it's more difficult with Privateer Press metal miniatures. Luckily, Pork has shown me the light - via a jeweler's saw we got a few years back ^_^ But with this project, I decided not to have the Long Riders undergo surgery.
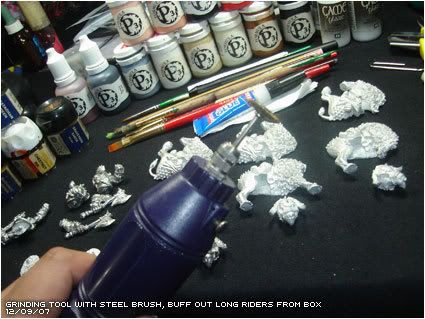
Another thing to consider about metal miniatures is that unless you prep up the metal before you paint, the paint rubs off more easily with handling (especially since we're talking about minis that get moved a lot on a battlefield table).
Pork and Arvin talked a lot about this - the release agent that's on the miniature, so that it doesn't stick to the mold; and some chemical reaction when the metal is shelved for a prolonged period of time. All that messes up with how paint is supposed to cling on to the metal. So, ALL the metal parts need to be cleaned, too. And I prefer to do that before assembling them.
I got a nifty grinding tool with a steel brush implement. I just take that whirring thing onto the metal and give it a nice shiny buff. Those steel brushes at hardware stores work as well, but I suggest not using the industrial-strength type steel brushes (those will erase a model's face LOL).
After the buff, I get some dishwashing liquid and some water, mix it together in a basin, and give the parts a nice bath. This works with those recesses that the grinding tool can't reach. I use a steel brush for this, but since there's a lot of splashing involved, I didn't get a picture of that step.
The main body of the Long Riders consist of two halves. If you just superglue them together, you'll have unsightly gaps that could ruin even the best masterclass paintjob you put on it. To close it up, you need to fill it up with putty. Most miniature modelers use Green Stuff. I just roll those up and line one of the Long Rider halves, and add some super glue as well, before slapping them on together. You should allow the putty to squeeze out and fill in those gaps.
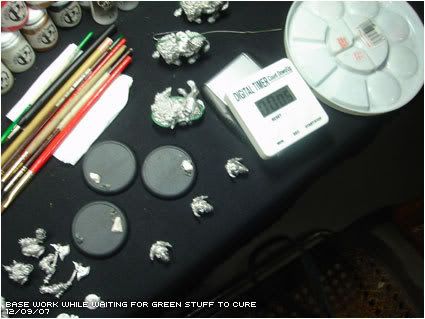
I then break out the timer and wait for 10 minutes. This is also important, as Green Stuff needs to cure a bit before you can work on it effectively. I have made countless attempts previously with using Green Stuff for gaps and working on it without having it cured first. It just ends sadly as the putty usually comes out of the gaps as soon as you try to smooth it.
Another important thing to remember when working with putty is always keep your hands and tools wet. It's putty, it'll stick. Water helps a lot so keep a bottle of water nearby where you can dip your fingers and/or tools.
With the ten minutes, I decided to do some base work for the Trollblood cavalry. I got some various sized pebbles and superglued them onto the bases.
This is what I've been doing with the Long Riders so far. For any comments or criticisms, feel free to discuss it in the comment section of this post ^_^


No comments:
Post a Comment